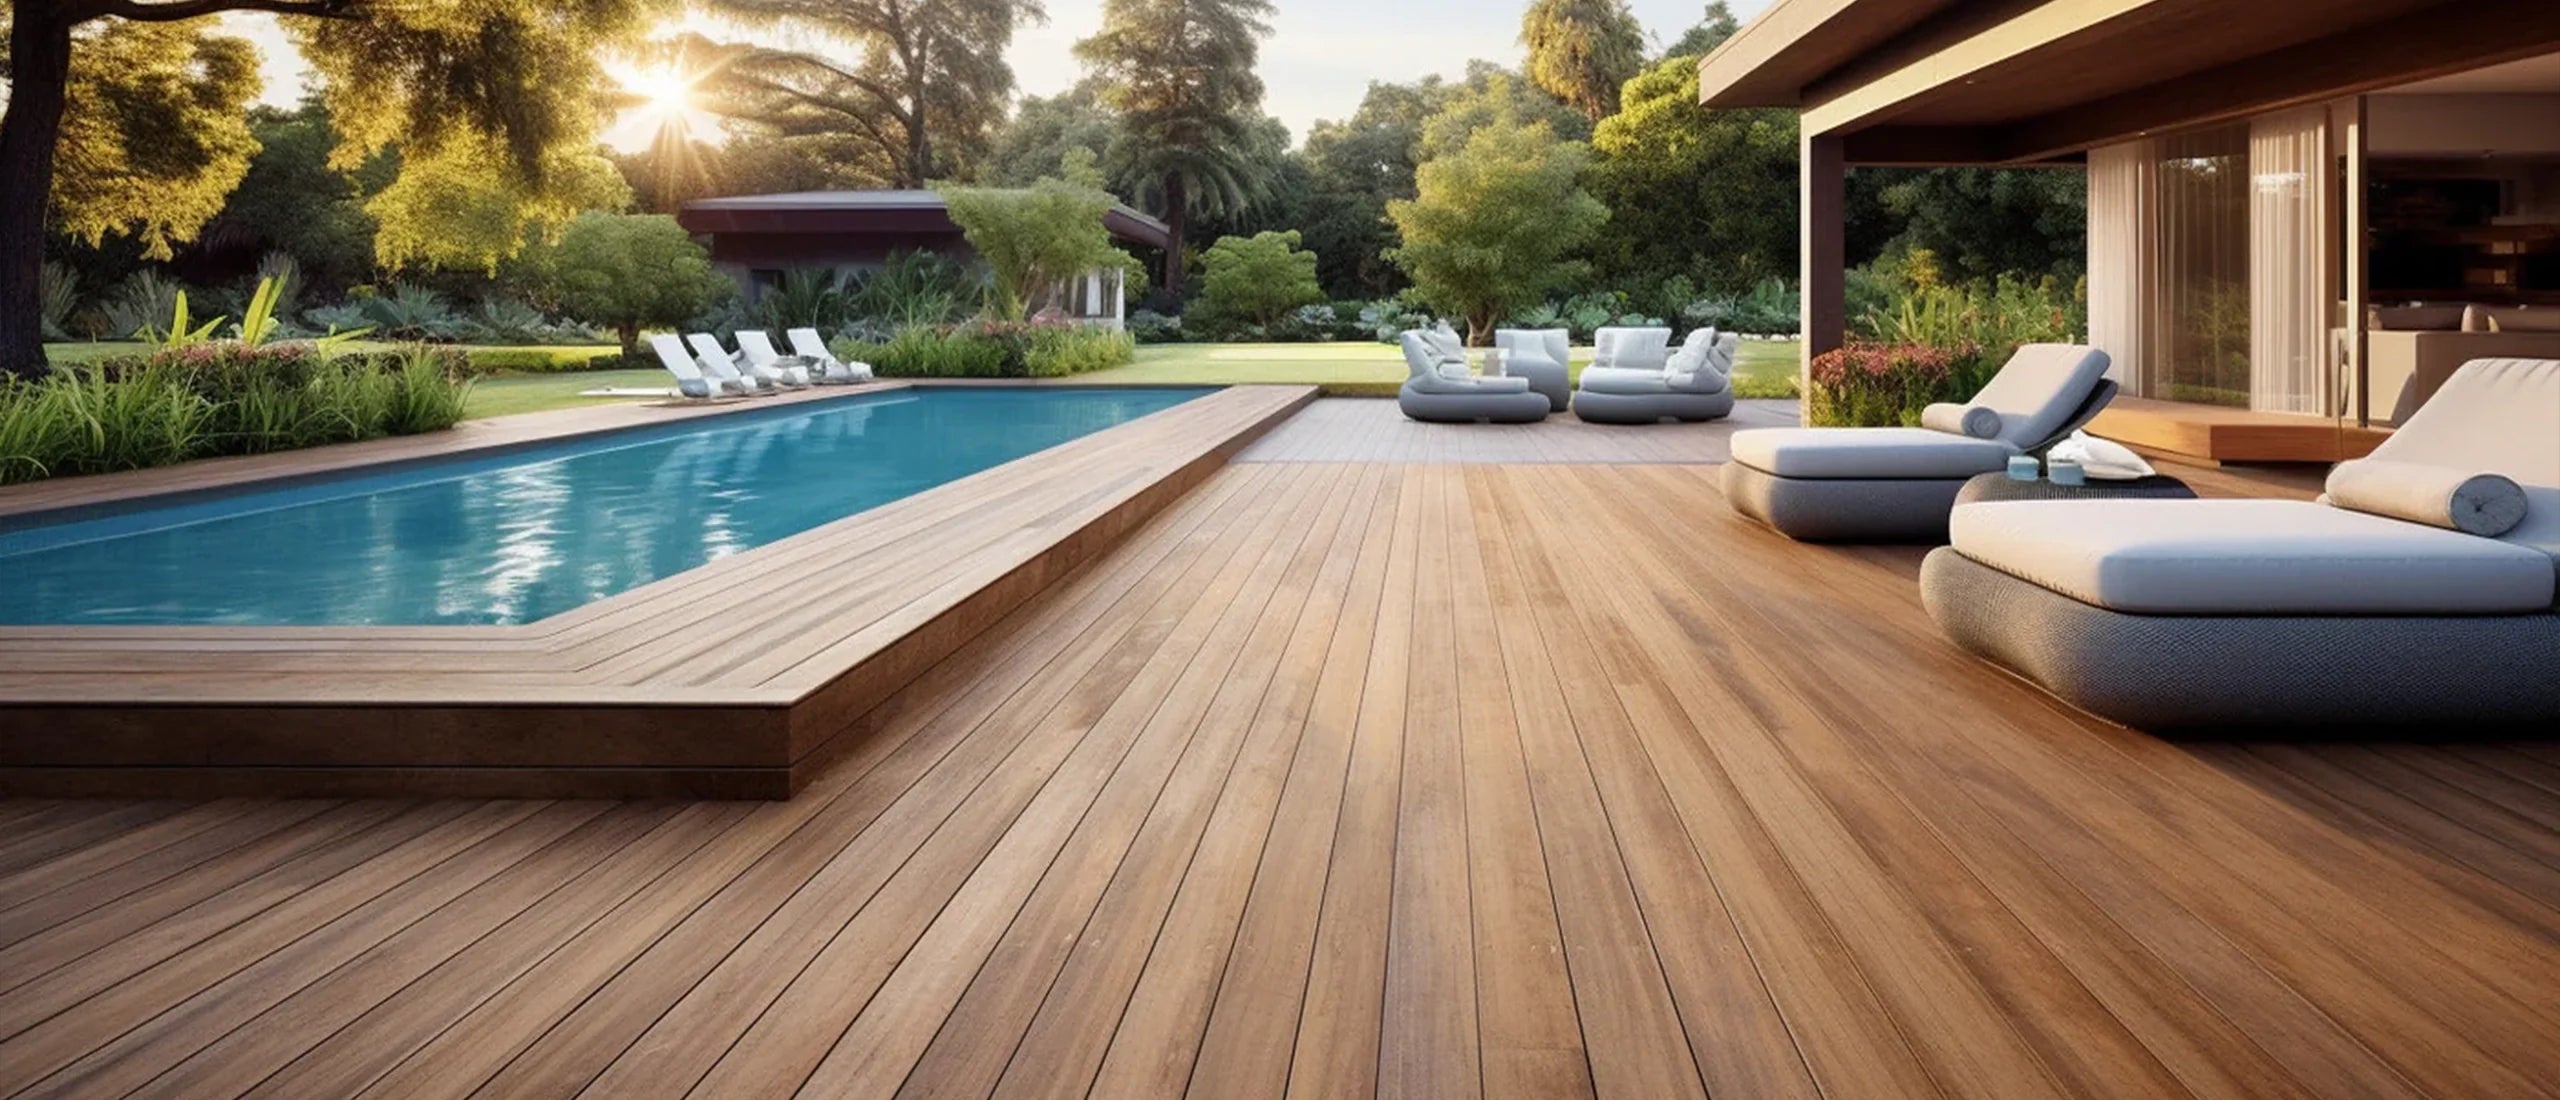
How to Refinish a Wood Deck & Restore Its Original Beauty
Refinishing your patio deck every couple of years will reduce cracking and splinters and help it last longer. Wood has the ability to be sanded and refinished to restore it to its original qualities. What other product can you do this with! Refinishing your deck is fairly simple. You'll have give it a thorough cleaning, stain it, and then seal it to protect it from the elements!
I'm going to try to make this as simple and straight forward as possible without omitting any of the major key points to remember when refinishing a deck. As always, feel free to tweet me any questions @SuperInteriors!
Frequently Asked Questions About Refinishing a Wood Deck
Clean, stain, seal—done. Refinishing is straightforward: scrub, strip off the old finish, pressure wash, let the wood dry, then apply stain and sealant to protect against the elements. Patio Productions keeps the process simple so your deck looks new again.
From under $100 to a few hundred. Typical DIY line items: pressure washer $40–$200, brushes $5, stain $10, sealant $30. Overall it may run a couple hundred dollars; hiring out averages $500–$700 for an average deck. Patio Productions helps you plan the budget.
Plan 3 days total. Day 1: restore, stain, and seal. Days 2–3: drying—keep the deck clear while stain/sealant cures. Allow at least 48 hours. Spring's mild weather is ideal for this timeline.
Cedar, redwood, PT pine, hardwoods, composite. Cedar/redwood resist rot; pressure-treated pine is budget-friendly; ipe/tigerwood are extremely durable; composite is very low-maintenance. Choose based on climate, budget, and how much upkeep you want to do.
Scrub, strip, pressure wash—then dry fully. Use a stiff broom and detergent (Outdoor Oxy Clean) to scrub, apply a wood stripper to remove old stain, then pressure wash thoroughly and rinse off chemicals. Let the deck dry completely before staining.
Apply evenly; seal for all-weather use. Roll for speed, brush for coverage; spray guns work great if you have one. Use even strokes. Choose clear, tinted, semi-transparent, or solid stains; more coats deepen color. Seal the deck (even between coats) for added protection.
Work in sections; watch the weather. Tackle small areas; use a deck staining pad to reach grooves; consider oil-based stains for extra protection. Always follow product directions and avoid refinishing if rain is expected within 48 hours.

Budget - Cost To Refinish a Deck
As you might imagine, the cost of restoration largely depends on the size of your deck but it can be done for a less than $100 if you really want to. Things that come into play are the level of the soil and more importantly the type of wood. You can choose from natural woods like Western Red Cedar and Mahogany or use composite materials like ipe decking or polywood. Pressure treated wood is optimal for the outdoors but you can stick to natural woods if you don't like the idea of synthetic chemicals.
Pressure Washer – $40-$200
Paint Brushes and Rollers – $5
Stain – $10
Sealant- $30
This might run you a couple hundred dollars and save you a few bucks in the long run. Restoring your deck is simple and straight forward but it does put the "sweat" in sweat equity. You'll have to roll up your sleeves and do this as a weekend project. If not, you can expect to pay between $500-$700 for an average sized deck.
Timeline:
You need to have your deck free of obstructions for 3 days. 1 day will be committed to restored the deck, staining, and sealing. The other 2 days will give your deck 48 hours to dry. Spring is a great time to refinish a deck because the sun is out and the weather hasn't quite reached summer temperatures yet!

Choosing Wood Types
When refinishing your deck, you have a few options for what type of wood to use. Here are some of the most popular choices:
- Cedar - Cedar is naturally resistant to rot and decay. It has a reddish-brown color and ages to a silvery gray. Cedar is a great choice for staining.
- Redwood - Similar to cedar, redwood is durable and resistant to insects. It has a reddish color that can be stained or left to weather naturally.
- Pressure-Treated Pine - The most affordable option. Pressure treatment helps protect pine from rot and insects. It accepts stain well.
- Tropical Hardwoods - Hardwoods like ipe and tigerwood are extremely durable. They have a reddish-brown color and can be left unfinished.
- Composite - Composite decking is made from wood fibers and plastic. It is very low maintenance, but costs more upfront.
Consider the climate of your area, budget, and desired maintenance level when choosing wood species for your deck refinishing project.
5 Steps to Refinishing a Wood Deck

1. Prep the Deck by Cleaning
When applying any type of coating, paint, or stain, you need to make sure that the contact surface you're working on is clean and free of debris. This will ensure that the finish sticks and doesn't just chip off. If you don't do a good job prepping the surface of your deck for the final step, it will not come out the way you want it to look.
Some people just simply hose down their deck with a nozzle and a garden hose. I would caution you from doing this as this will not create good results. The best way to prep a deck is by scrubbing, stripping, and pressure washing the entire deck.
A. Scrubbing – Use a hard bristled broom and detergent to scrub away any dirt that may be scuffed into the deck. Outdoor Oxy Clean will do the trick. It doesn't have to be perfect, only clean enough to begin stripping and pressure washing.
B. Stripping – To remove the old stain from the deck, you'll need to use a paint/sealant stripper. You can find wood strippers at your local home improvement stores. Follow the instructions on the can to get the best results. By removing the existing finish, you will ensure that the new stain goes on a fresh wood surface, creating better adhesion and a long lasting finish. If you're contemplating whether this step is worth it, it is not an option!
C. Pressure Wash – Now for the fun part. If you already own a pressure washer, you're in business! A quick power wash will dislodge any debris or dirt that is nestled within the small grooves of your decks surface. You can add some Oxy Clean to the deck while doing this to get out tough spots, just make sure that you remove all of the cleaning chemicals before proceeding.
2. Tidy Things Up a Bit
Now's the time to repair any broken planks, drill in loose boards, and replace warped boards. This will also give your deck time to dry. You want to be absolutely sure that the deck is completely dry and free of moisture before you begin staining. Water can dilute the stain and cause discoloration.
3. Staining Wood Decks

To stain your deck, you can use a paint roller to speed up the process and then go over everything with a paint brush to get to hard to reach areas. Alternatively, paint sprayers (or spray guns) work even better but they aren't absolutely necessity if you want to keep your budget low. If you plan on doing other home improvement projects, it might be an investment worth considering!
Wood finishes come in many different shades and hues. You can find wood stain clear, tinted, semi-transparent, and solid colors. Also, adding more coats will darken the finish as stain absorbs into the wood unlike paint which only layers on top of the exterior surface of the wood. Keep in mind, clear or tinted stains don't last that long. Although they add a certain flare, these types of stains only last for about a year before you notice deterioration.
Start at an inside corner and work your way out. Apply even strokes to avoid dark spots on your deck. When using a spray gun, make sure you keep the nozzle parallel to the deck to ensure an even and uniform finish.
4. Sealing the Deck
The final step is to seal the deck for all-weather use. Depending on where you live, you're deck will likely experience high temperatures, rain, and even snow. Adding the sealing will help protect your wood from damage caused by changing weather conditions. You can even apply sealant in between coats of stain to create a layered protection.
Finishing Touch
Once everything is all done and you're satisfied with the finish, allow your deck at least 48 hours to dry. Don't allow the kids or pets to run on it by accident or you will have to rework these areas. When the stain has cured, you may notice that it became a tad lighter but this is natural.

Extra Tips
Here are some additional pointers to help your deck refinishing go smoothly:
- Work in small sections instead of tackling the whole deck at once. This allows you to complete each step - clean, stain, seal - before the wood dries.
- Use a deck staining pad or padco to get stain into the cracks and grooves of the wood surface.
- Consider using an oil-based stain for extra protection and durability. It may require more maintenance but can be worth it.
- Always follow the manufactuer's instructions for application and drying times when using stripper, stain, or sealant on your deck.
- Check the weather forecast and avoid deck refinishing if rain is expected within the next 48 hours. Moisture can ruin your hard work!
Now that you've refinished your wood deck, it's ime to decorate your patio with some new outdoor furniture from Patio Productions! Find everything you need from outdoor day beds to hanging swings all within a reasonable price point!
Patio Productions
Patio Productions San Diego
2161 Hancock St
San Diego, CA 92110
More Home Improvement Projects:
- How to Stain Concrete Patio Slabs
- Waterproof Your Awning
- 7 Backyard Renovations that Boos Home Value
About the Author
Cheryl Khan is a graduate of the University of California San Diego. She enjoys writing, taking the scenic route, and experimenting with cultural cuisine! Get in touch by sending her on Facebook and Google+!
Reader Comments
sarah May 20, 2014
Hi there,
Would you happen to have any outdoor living images that feature western red cedar decking?
Sarah
Patio Productions June 11, 2014
Hi Sarah,
We don't have an image that we own but you can take a look at this one found on Team Home Missions that will give you an idea of the colors you might expect.
http://www.teamhomemissions.com/wp-content/uploads/2012/11/Cedar-Decking-in-Dark-Brown.jpg
Red cedar wood is very resistant to warping and shrinkage so it really makes for a great material for decking.
Connie B June 30, 2018
My deck is already stained a dark color,but I want to do the spindles all white now, and two tone the deck. Do I really have to strip each one or can I stain over with a lighter color? They are still in pretty good condition. What do you feel is the best product to use? Also what about exterior white paint instead of stain, since spindles don't get much wear?


